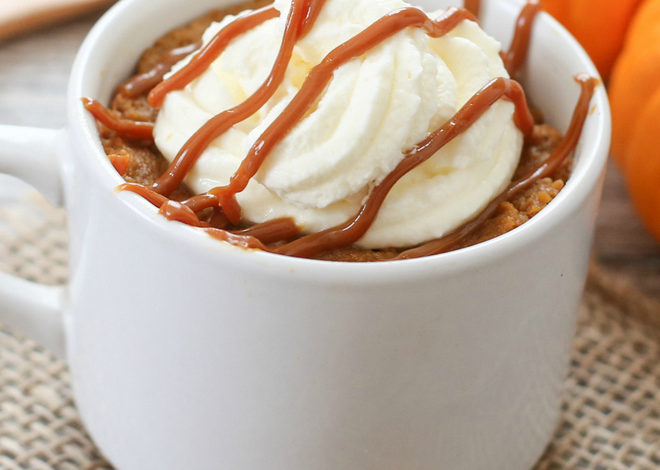
🧡Pumpkin Pie Mug Cake🤏
Ingredients:
- 4 tbsp (2-oz) canned pumpkin puree
- 1.5 fl oz heavy cream
- 2 tbsp granulated white sugar
- 1 tsp pumpkin pie spice
- 1 tbsp whisked egg
- 1 tbsp butter melted
- 4 1/2 tbsp finely crushed graham cracker crumbs or ginger snaps or biscoff speculoos cookies
Instructions:
1Lightly grease the inside of a microwave-safe mug at least 8 oz in size. In a small bowl, add melted butter and cookie crumbs and mix until crumbs are completely coated. Pour into greased mug and press crust to the bottom of the mug evenly, applying some pressure to compact it.
2In a medium bowl, add pumpkin puree, heavy cream, sugar, spice, and egg. Mix with a small whisk until batter is smooth. Pour mixture into mug, on top of crust.
3Cover the mug with a paper towel (because we’re dealing with a pie, it will bubble and splatter slightly while cooking). Cook for 1 minute, with power setting to level 7, or 70%. This prevents the pie filling from cooking too quickly and splattering too much. After 1 minute, the pie filling should be about halfway done. Set for another 1 minute at power level 7. Now the cake surface should have holes and look cooked (like photo above) and should be pulling away from the sides. If you press on it though, the texture should still be quite mushy. Place paper towel back on and cook for another 2 minutes at power level 7. At this point, the cake should begin to firm up. If you want a more softer pie-like filling, you can stop at this point. If you want something firmer and more stable, cook for an additional 2 minutes at power level 7. If you want a really firm, cake-like texture, cook for a final 2 minutes at power level 7. It really depends on how firm you want it. I thought it tasted great with all the different textures.
4Let cake cool a few minutes before topping with whipped cream and caramel sauce. I put mine in the freezer for a few minutes, so the surface became cool enough to put whipped cream on, but it was still warm inside.


Your point of view caught my eye and was very interesting. Thanks. I have a question for you.